Abstract
In this section, we concentrate on using K3b to perform common CD burning operations. DVD recording is very similar to its CD counterpart.
![[Note]](images/note.png) |
Note |
|---|---|
Copyrighted Material. Please note that data, audio, video CD or DVD copying is often forbidden by copyright law. We assume that if you want to duplicate copyrighted material, it's because you have the right to do so. |
Choose ++ → from the main menu to start K3b. Figure 4.6, “K3b's Interface” shows K3b's interface with a new data project open.
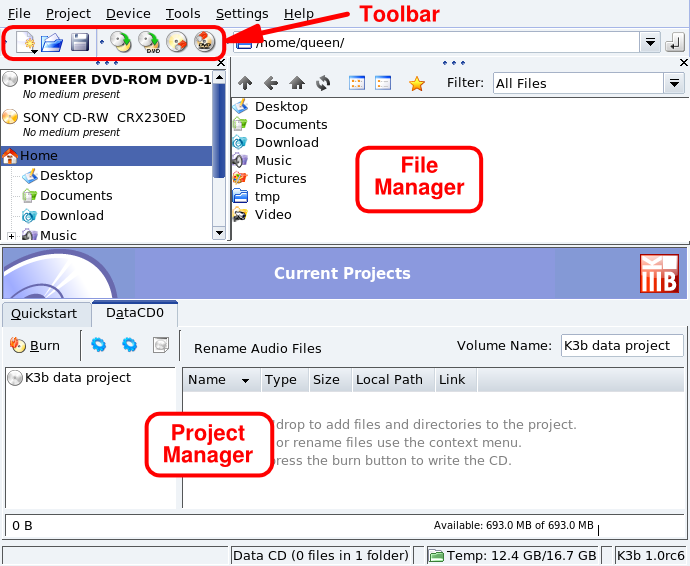
Toolbar. Where buttons to perform common actions lie. See Table 4.1, “K3b's Toolbar Buttons”.
File Manager. To choose which files to include in the burned CD. Use the left-side tree to navigate the file system, then drag-and-drop the files you want to include into the Project Manager.
Project Manager. Where all files which will be on the burned CD are shown and handled. Files can be removed and their location (directory) on the CD can be changed here.
The following table shows the most important buttons available in K3b's toolbar, their equivalent keyboard shortcuts, and a brief explanation of the functions they provide.
|
Note |
|---|---|
Not all buttons are enabled at all times. For example, the button is not enabled if there is no active project. |
Table 4.1. K3b's Toolbar Buttons
| Button | Keyboard Shortcut | Function |
|---|---|---|

|
Create a New Project. When you click on this button, a list of available project types is shown: creates a data CD; (see Section 3.2, “Burning Data CDs”); creates a data DVD; creates an audio CD; (see Section 3.3, “Burning Audio CDs (CDDA)”); creates a mixed mode (data+audio) CD; creates a digital compressed video CD; creates a video DVD; that is a video DVD that can be played on any DVD player; creates an eMovix CD; creates an eMovix DVD. |
|

|
Ctrl-O |
Open an existing project. A standard file dialog opens from where you can choose the project you want to open. Select the project you are interested in and click . |

|
Ctrl-S |
Save the current project. A standard file dialog opens where you can enter the name under which you want to save the current project. Type the name of the project and click . |

|
Copy a CD. To make an exact copy of a CD. It opens a window which asks for the copy settings. Refer to Section 3.5, “Duplicating a CD”, for more information. Please note that you cannot duplicate copyrighted DVD movies with this function, as they are encrypted. |
|

|
Erase a CD-RW. To erase re-writable CD medium. It opens a window which asks for the erase operation settings. Please refer to Section 3.6, “Erasing CD-RW media”, for more information. |
|

|
Format a DVD-RW. To format a re-writable DVD medium. It opens a window which asks for the formatting settings. |
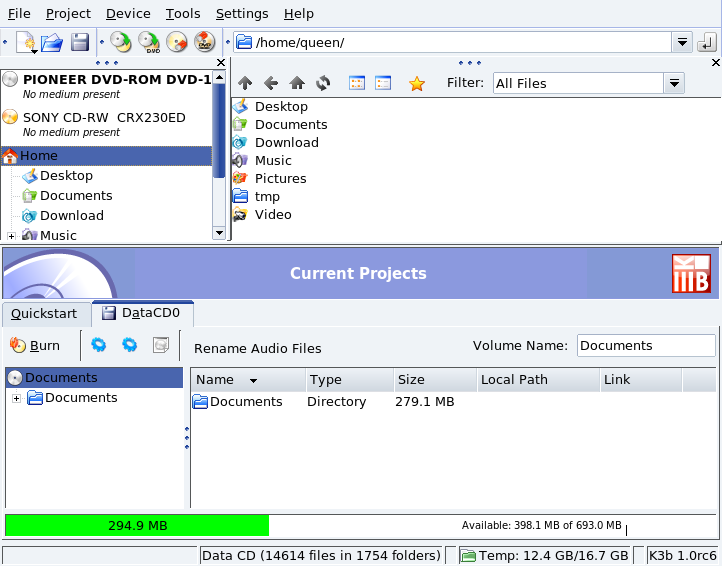
Choose + → from K3b's menu . Then drop into the Project Manager the files and directories you want to include on the CD (see Figure 4.7, “Selecting Files and Directories to Include on a CD”).
|
Note |
|---|---|
Adding directories
containing lots of files can take some time. Please be patient
and wait until the |
The space occupied by the selected files and directories is shown by a color-coded bar at the bottom of the Project Manager, together with the volume expressed in MB and the available MB of the medium's total capacity. The bar's color codes are as follows:
- Green
The size of the set is less than that of the selected medium's capacity (700 MB by default). There are no capacity-related problems.
- Yellow
The size of the set is nearly equal the selected medium's capacity. If it's a few MB below the medium's capacity, there won't be any capacity-related problems; if it's a few MB above, the CD might be written without problems, but there's little guarantee of success.
- Red
The size of the set exceeds the medium's capacity by many MB. The CD won't be burnt properly.
Right clicking on any file or directory in the Project Manager pops up a contextual menu with options to remove and rename files, create new (empty) directories, etc. Files and directories can be relocated (change the directory under which you want them to appear) on the CD using drag-and-drop.
![[Tip]](images/tip.png) |
Tip |
|---|---|
Renaming the top
element of the left side tree in the Project Manager changes
the CD's volume name ( |
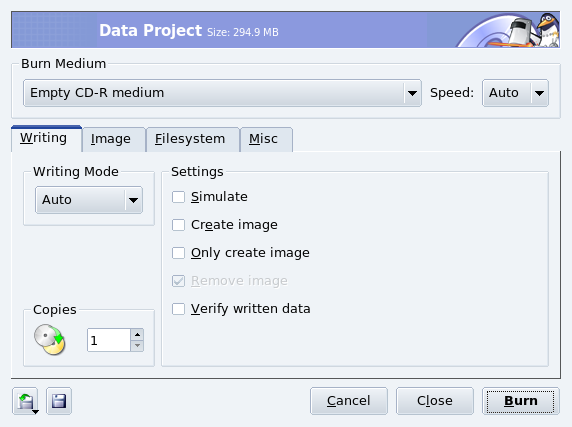
Insert a recordable medium in the CD burner and click on the button or choose the → menu entry. Then select writing parameters (see Figure 4.8, “Setting Writing Parameters”) and click the button to start writing the CD.
Let's assume you have downloaded a CD-ROM image from the Internet and you want to burn it on a CD. Choose → from K3b's menu. Click the “open file” button to browse for the CD image file and select the file in the standard open file dialog. The CD image is then verified and information about it is displayed (see Figure 4.9, “Burn CD Image Options”).
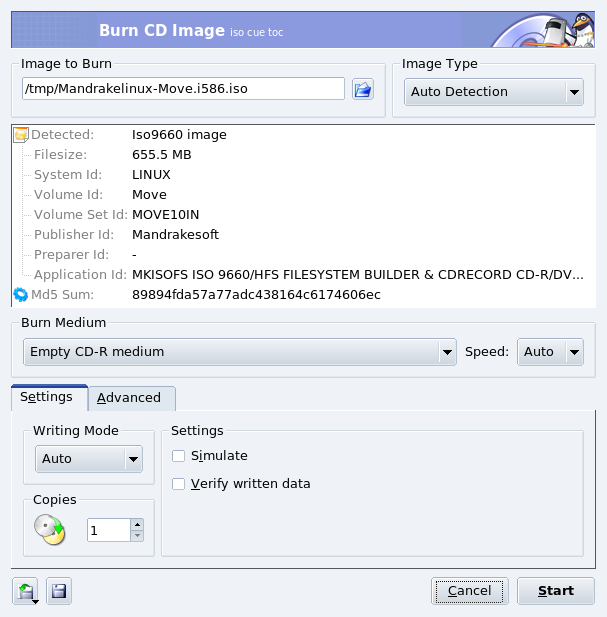
Once the image is verified, you can insert the recordable medium and click to write it to the disc.
By audio CDs, we mean the ones you play in your car or home stereo equipment, not data CDs containing OGG, MP3 or any other digital audio format files.
K3b supports
recording audio CDs from tracks digitized in Wave
(*.wav), Ogg Vorbis (*.ogg),
and MP3 (*.mp3) formats. You can mix digital
audio formats since K3b decompresses the compressed ones
on-the-fly. K3b can also create digital audio tracks from
audio CDs, also known as “ripping” (see Section 3.4, “Audio CD Extraction or Ripping”).
Choose + → from K3b's menu. Select K3b's File Manager's filter to Sound Files, navigate to where the digitized audio files are and then drag the audio tracks and drop them in the Project Manager (see Figure 4.10, “Selecting Audio Tracks to Include on the CD”).
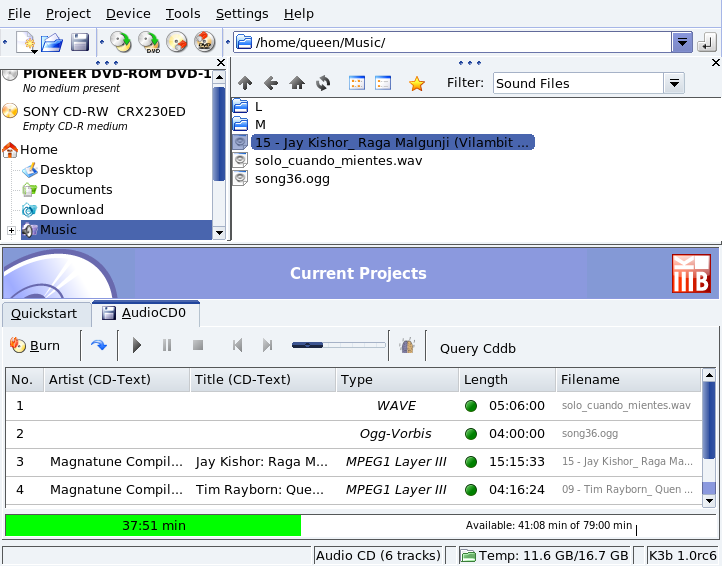
Use drag-and-drop to move the files up and down the compilation. Once you have the tracks compiled in the order you want in the Project Manager, you can write them to CD.
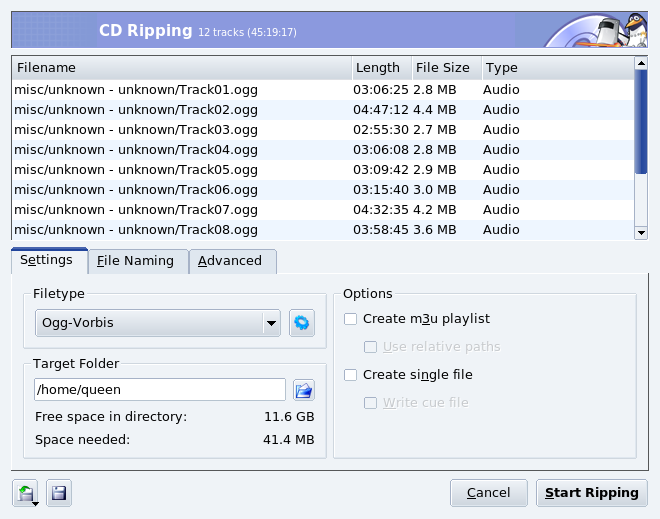
Insert the audio CD to rip tracks from and click on the drive in the left side of the File Manager. The CD is read and, by default, all tracks are marked to be ripped. To remove the check mark from those you don't want to rip, right click on them and choose from the menu that pops up.
 Click this button to review the different
ripping options (see Figure 4.11, “CD Ripping Options”), especially the file naming ones. Once you're
satisfied with your settings, click .
Click this button to review the different
ripping options (see Figure 4.11, “CD Ripping Options”), especially the file naming ones. Once you're
satisfied with your settings, click .
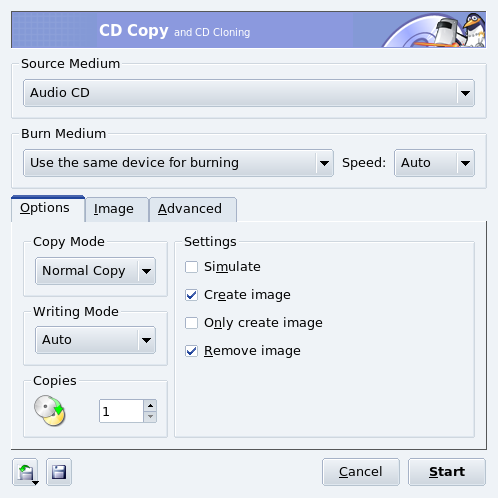
Choose
→ from the menu. Select the number
of copies (1 in the example), whether to remove
the temporary image or not (yes), the reader and burning devices (automatically set), and
click . The “source” CD is then read, an image of
it is made, and the “target” CD is written.
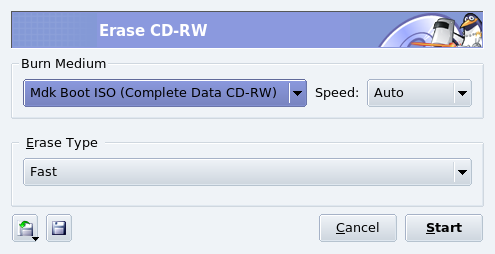
You might want to format your CD-RW media in order to write it with different data. To do so, insert the medium in the CD burner and choose → from the menu (see Figure 4.13, “Setting CD-RW Blanking Options”). The Erase Type can be set to Fast (the CD-RW is quickly erased in up to 3 minutes); Complete (the CD-RW is completely erased taking up to 90 minutes); and a few options related to multi-session recording are also available. Click to erase the CD-RW.