GNU/Linux applications support a simple printing method based on a program called KPrinter which can even be used to build PDF files and to send faxes.
Just click on any application's print button to invoke the printing interface. In most cases, this is KPrinter. Select the required print settings and click on the button to start printing.
KPrinter allows you to set many options for printing your documents[3], such as the output device (generally a physical, local or remote printer), the number of copies, the paper size, the printer resolution, etc.
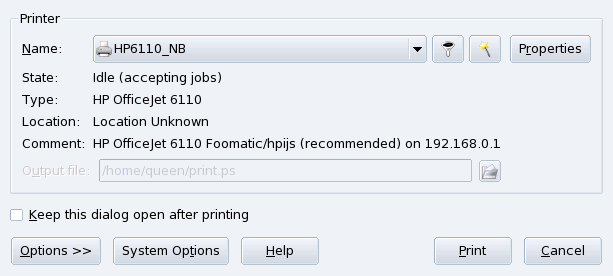
Choose the printer using the pull-down list in the Printer section. You can further configure the printer settings by clicking on the button. Click on the button at the bottom to set more printing options and on the button to access global printing configuration.
![[Tip]](images/tip.png)
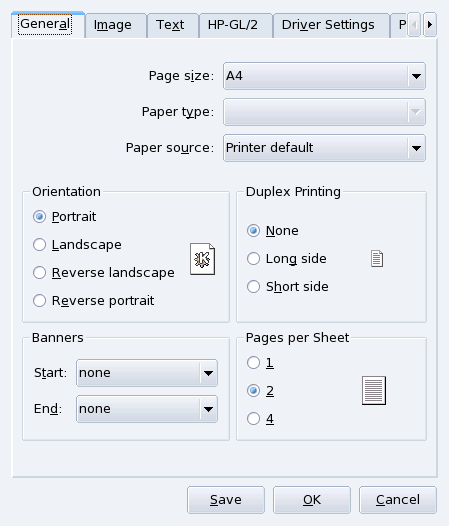
One option worth mentioning is Pages per sheet (set to 2 in the example). This allows you to put up to 4 pages onto a single sheet of paper (or 8 if you can print on both sides). This is a nice feature to save paper when printing book drafts or other lengthy material which changes often.
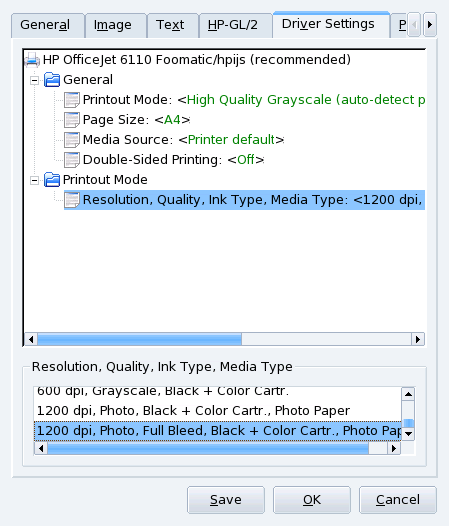
Click on the Driver Settings tab to change printer-specific options such as the resolution of the printing device. When you click on the Resolution option the available resolutions are displayed, select the one you want from the list.
Other settings include printing modes which use less toner or ink (search for something like “Economy Mode”, “Toner Density” or “Toner Saving”). However, the output is much paler. If this is not available, choosing a lower resolution often has similar effects.
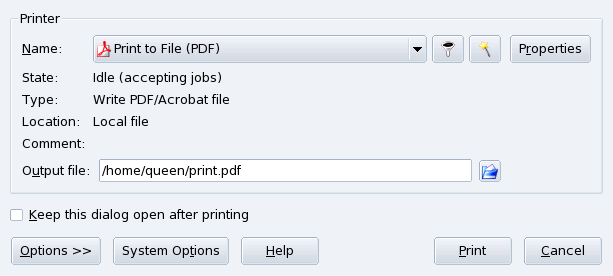
Select the Print To File (PDF) special printer, enter the file name in the Output file field as shown in Figure 3.10, “Generating a PDF File”, and click on to build a PDF file.
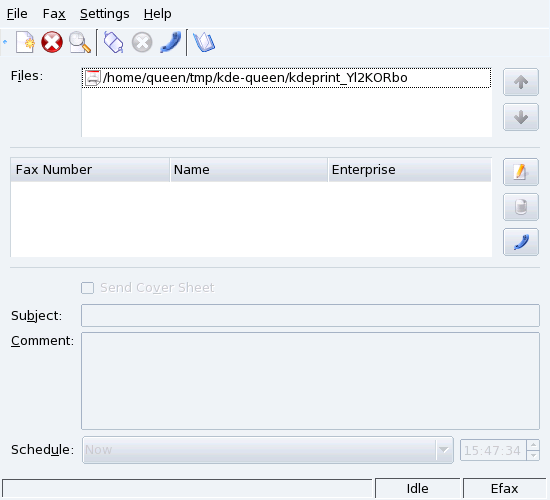
The special Send To Fax printer allows you to send the document you are working on directly by fax[4]. When you click on the button, a dialog similar to the one shown in Figure 3.11, “Faxing Main Window” appears.
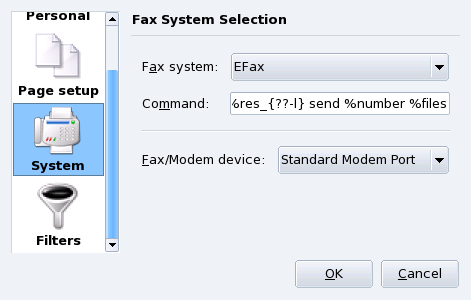
The first time you select this function you need to make sure that your fax modem is properly configured, select → from the menu. Fill the information under the Personal section with your name, company and fax number. In the System section make sure that the correct faxing system and its corresponding parameters are set. An example is shown in Figure 3.12, “Fax Settings”.
 Select the fax number from the list
(or add a new entry for the number you are trying to reach) and
click on the button, or press the
Enter key, to send the fax immediately.
Select the fax number from the list
(or add a new entry for the number you are trying to reach) and
click on the button, or press the
Enter key, to send the fax immediately.
![]() The
button (Ctrl-L) shows a window with the fax
activity log (check it to make sure your fax has been sent
correctly).
The
button (Ctrl-L) shows a window with the fax
activity log (check it to make sure your fax has been sent
correctly).
![]() The button (Ctrl-A) opens the KDE address
book to let you select fax numbers to dial.
The button (Ctrl-A) opens the KDE address
book to let you select fax numbers to dial.
If you are the owner of an HP multifunction printer (print, scan, fax), and already installed it (see Section 6, “Configuring Printers with PrinterDrake”), then you have a special virtual printer available that queues documents to be faxed.