KMail is KDE's mail client. It is both full-featured and easy to use. This section focuses on KMail's common features. We encourage you to refer to the integrated help to learn more about its advanced features.
Launch KMail by choosing + → from the main menu.
The first time you run KMail, a wizard appears to help you set up the mail account you will use with KMail. You only need to enter some connection data. Press the button to validate the information you entered and proceed with the setup.
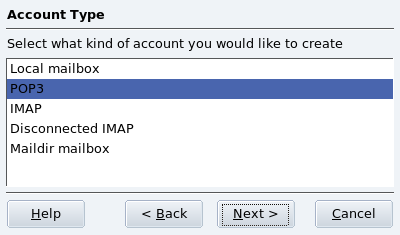
Select the account type from the proposed list and advance to the next step. Please bear in mind that the POP3 protocol downloads messages to the local computer (they can be kept on the server too), while the IMAP protocol doesn't. Both IMAP and POP3 account setups are the same.
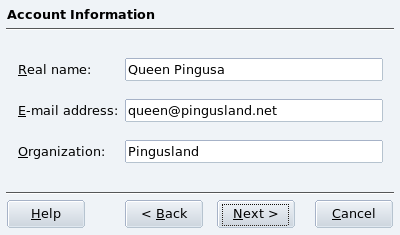
Then you have to provide your account information and fill in your personal data. Note that the name you input in the Real name field is the one that will appear on your outgoing mails.
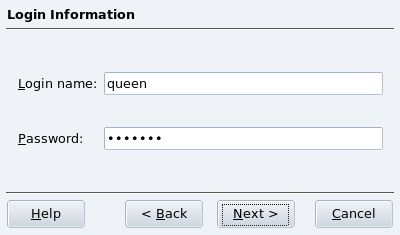
Then you must give the account credentials: enter your login and password. Your ISP or system administrator should have provided this information together with your e-mail address.
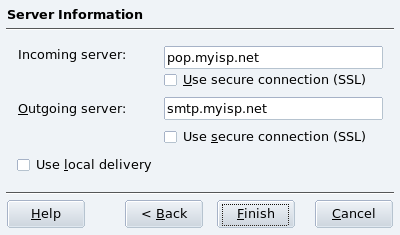
You are finally asked to provide mail server
parameters. Again, your ISP or system administrator should have
provided you with the incoming and outgoing mail server information. Outgoing
servers are usually of the smtp.provider.net
form. Incoming POP3 servers are usually of the
pop.provider.net or
pop3.provider.net forms. Incoming IMAP
servers are usually of the imap.provider.net
form. The mail.provider.net form is also
common for both incoming and outgoing mail servers.
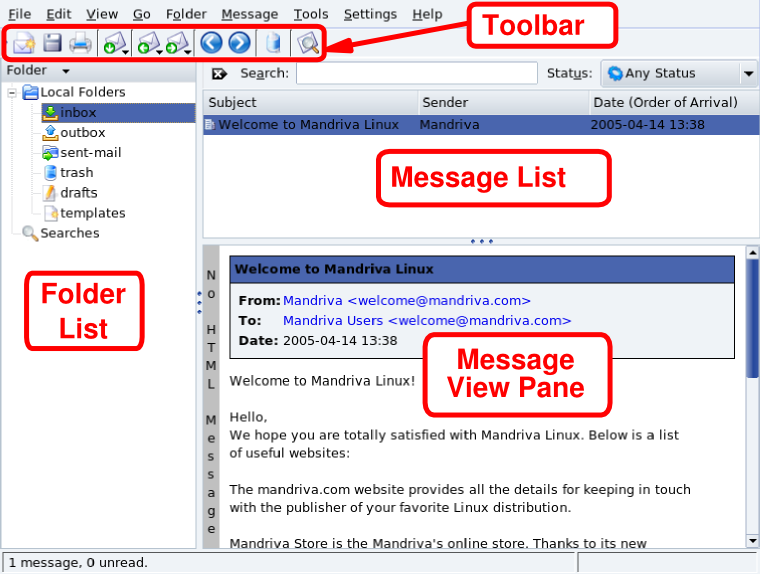
Toolbar. Where the main action buttons lie. See Table 2.1, “KMail's Toolbar Buttons”.
Message List. Where information (subject, date, sender, etc.) about messages stored in the currently selected folder is displayed.
Message View Panel. Where the contents of the currently selected message are displayed.
Folder List. Where all folders
are listed. The default folders are inbox
(incoming messages), outbox (unsent
templates), sent-mail (already sent
messages), trash (deleted messages),
drafts (draft messages) and
templates (templates for writing
messages). There is also a
special folder named Searches which contains
the results of a search for messages.
The following table shows the most important buttons available in KMail's toolbar, their equivalent keyboard shortcuts, and a brief explanation of the functions they provide.
Table 2.1. KMail's Toolbar Buttons


![[Note]](images/note.png)
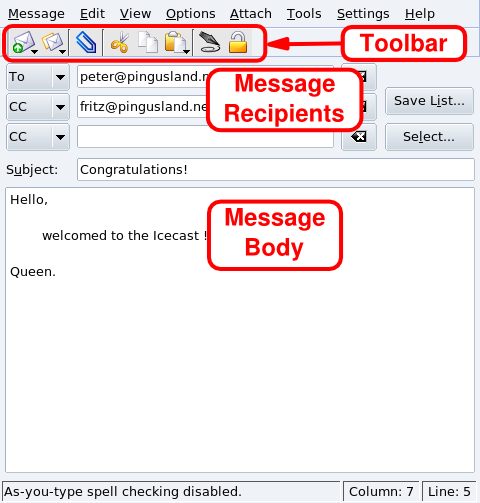
Toolbar. This is where the main message composition buttons reside. See Table 2.2, “Message-Composition Toolbar Buttons”.
Message Body. The area where you type the content of your message.
Message Recipients. The list of all recipients of this message. The following options are shown:
CC(Carbon Copy): not-hidden secondary intended recipient(s) of this message. All recipients have access to the mail addresses to which this message is sent.BCC(Blind Carbon Copy): these recipients are also secondary but are hidden from the other recipients of this message. No recipients of the message have access to the other mail addresses to which this message is sent.
The following table shows the buttons which are mostly used in the message-composition window, their equivalent keyboard shortcuts, and a brief explanation of the functions they provide.
Table 2.2. Message-Composition Toolbar Buttons


