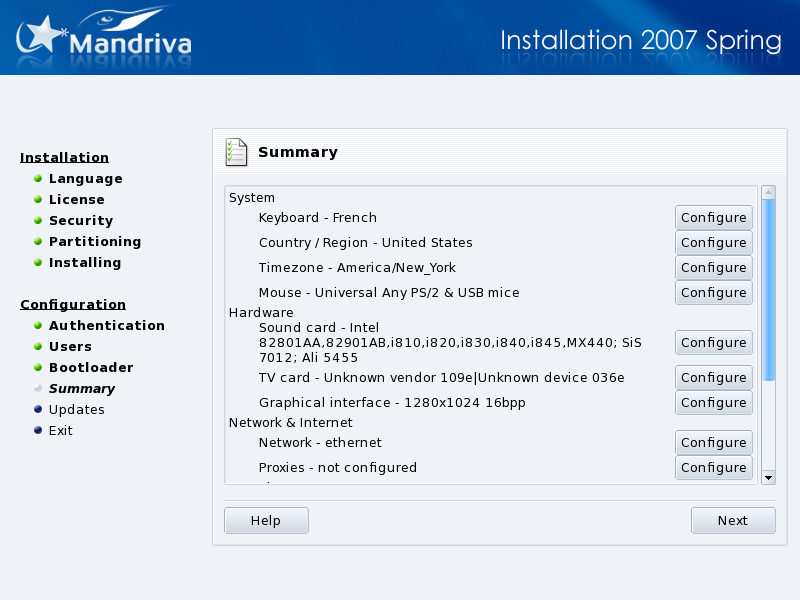
As a review, DrakX presents a summary of information it gathered about your system. Depending on the hardware installed on your machine, you may have some or all of the following entries. Each entry is made up of the hardware item to be configured, followed by a quick summary of the current configuration. Click on the corresponding button to make any changes.
Keyboard: check the current keyboard map configuration and change it if necessary.
Country / Region: check the current country selection. If you're not in the country selected by DrakX, click on the button and choose another. If your country isn't in the list shown, click on Other Countries to get a complete country list.
Timezone: by default, DrakX deduces your time zone based on the country you have chosen. You can click on the button if this is not correct. See Section 12.2, “Time Zone Options”.
Mouse: verify the current mouse configuration and change it if necessary.
Sound card: if a sound card is detected on your system, it is displayed here. If you notice the sound card isn't the one actually present on your system, you can click on the button and choose a different driver.
TV card: if you have a TV card, this is where information about its configuration is displayed. If you want to try a different driver for your TV card, or its detection wasn't accurate you can click on to try to configure it manually.
Graphical Interface: by default, DrakX configures your graphical interface with a resolution that best matches your video card and monitor combination. If that doesn't suit you, or DrakX could not automatically configure it (not configured is displayed), click on to reconfigure your graphical interface. You can click on from within the configuration wizard to benefit from full in-line help.
Network: if you wish to configure your Internet or local network access, you can do so from here. Refer to the printed documentation or use the Mandriva Linux Control Center after the installation has finished to benefit from full in-line help.
Proxies: allows you to configure HTTP and FTP proxy addresses if the machine you're installing on is to be located behind a proxy server.
Security Level: this entry allows you to redefine the security level as set in a previous step (see Section 5, “Security Level”).
Firewall: if you plan to connect your machine to the Internet, it's a good idea to protect yourself from intrusions by setting up a firewall. Consult Section 3, “Securing your Internet Access via DrakFirewall” for details about firewall settings.
Bootloader: to change your bootloader configuration. This should be reserved to advanced users. Refer to the printed documentation or the in-line help about bootloader configuration in the Mandriva Linux Control Center.
Services: with this entry you can fine tune which services are run on your machine. If you plan to use this machine as a server it's a good idea to review this setup.
This setup allows you to refine the time zone you are currently located in. After you've chosen the location nearest to your time zone, two more options for time management are shown.
- Date, Clock & Time Zone Settings
GNU/Linux manages time in UTC (Coordinated Universal Time) and translates it to local time according to the time zone you selected. If the machine also hosts another operating system that doesn't handle time the same way, it's better to select the hardware clock set to local time option.
- NTP Server
If you check the Automatic time synchronization option the system clock will be regulated automatically by connecting to a remote time server on the Internet. For this feature to work, you must have a working Internet connection. We recommend that you choose a time server located near you or the default All servers entry which will select the best server for you. This option actually installs a time server which can be used by other machines on your local network as well.
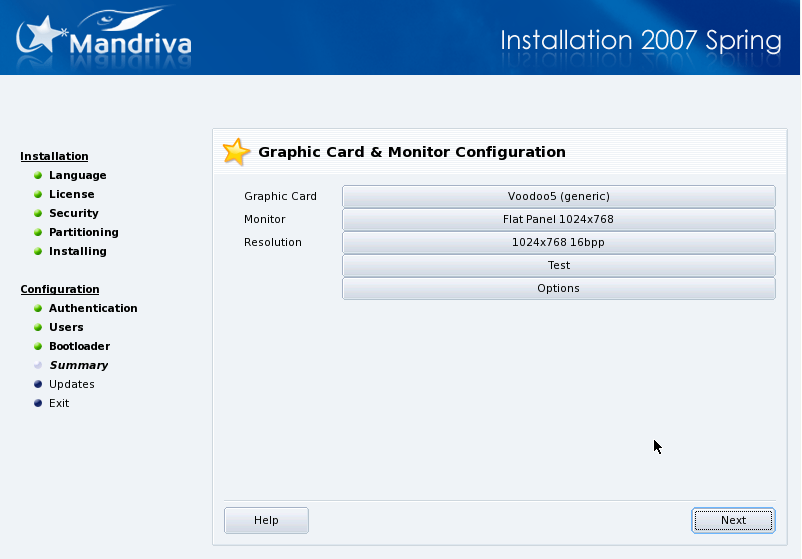
X (for X Window System) is the heart of the GNU/Linux graphical interface on which all the graphical environments (KDE, GNOME, AfterStep, WindowMaker, etc.) bundled with Mandriva Linux rely on.
- Graphic Card
If everything works fine, the installer should detect and configure the video card installed on your machine. If the detection or configuration is incorrect, you can choose the card installed on your system from a list.
- Monitor
If the installer fails to detect or configure your monitor properly, you can choose from this list the monitor which is connected to your computer.
- Resolution
Here you can choose the resolution and color depth from those available for your graphics hardware. Choose the one which best suits your needs (you will be able to make changes after the installation). A sample of the chosen configuration is shown in the monitor picture.
- Test
-
The system tries to open a graphical screen at the desired resolution. If you see the test message during the test and answer , then DrakX will proceed to the next step. If you don't see it, it means that some part of the auto-detected configuration was incorrect and the test automatically ends after a few seconds and returns you to the menu. Change settings until you get a correct graphical display.
- Options
- Graphic card options
Depending on your hardware capabilities, you can choose here to activate or disable specific features such as 3D acceleration or special visual effects (translucency).
- Graphical interface at startup
This option allows you to choose whether you want your machine to automatically switch to a graphical interface at boot. Obviously, you may want to select the No option if your machine is to act as a server, or if you were not successful in getting the display configured.
![[Note]](images/note.png)
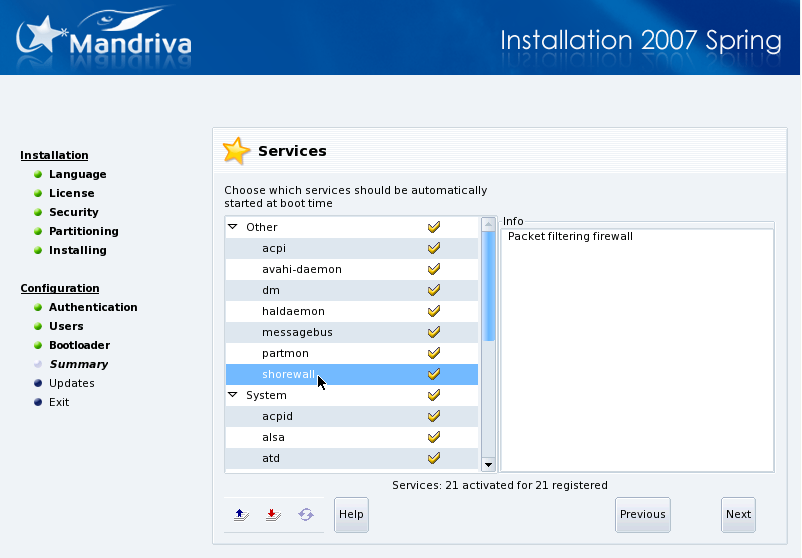
This dialog is used to select which services will be automatically started at boot time: DrakX lists all services available on the current installation. Review each of them carefully and uncheck those which aren't needed at boot time.
![[Tip]](images/tip.png) |
Tip |
|---|---|
A short explanatory text is displayed about a service when it is selected. However, if you're not sure whether a service is useful or not, it is safer to leave the default setting. |
![[Warning]](images/warning.png)